How to Make a Slab-Build Teapot Using a Pottery Template

![EtsyListingPictures-[Title].jpg](https://images.squarespace-cdn.com/content/v1/694a9ed4953ae663007329bf/1781008692662-ZEV10I8PS41H6J0IE4ZP/EtsyListingPictures-%5BTitle%5D.jpg)

Making a slab-build teapot may look complicated at first, but a reliable teapot template makes the process much easier. Instead of guessing the proportions, you can follow a tested shape and focus on building a beautiful, functional piece.
This project is ideal for anyone who wants to create a handmade teapot without using a wheel. It is also a lovely project for tea lovers and a thoughtful tea lover gift once finished.
What you need
Before you start, gather a few basic pottery tools:
Clay
Rolling pin
Knife or needle tool
Sponge
Ribs or small shaping tools
A template gives you structure, but the tools help you refine the shape and join everything cleanly. That combination is what makes slab building feel manageable instead of overwhelming.
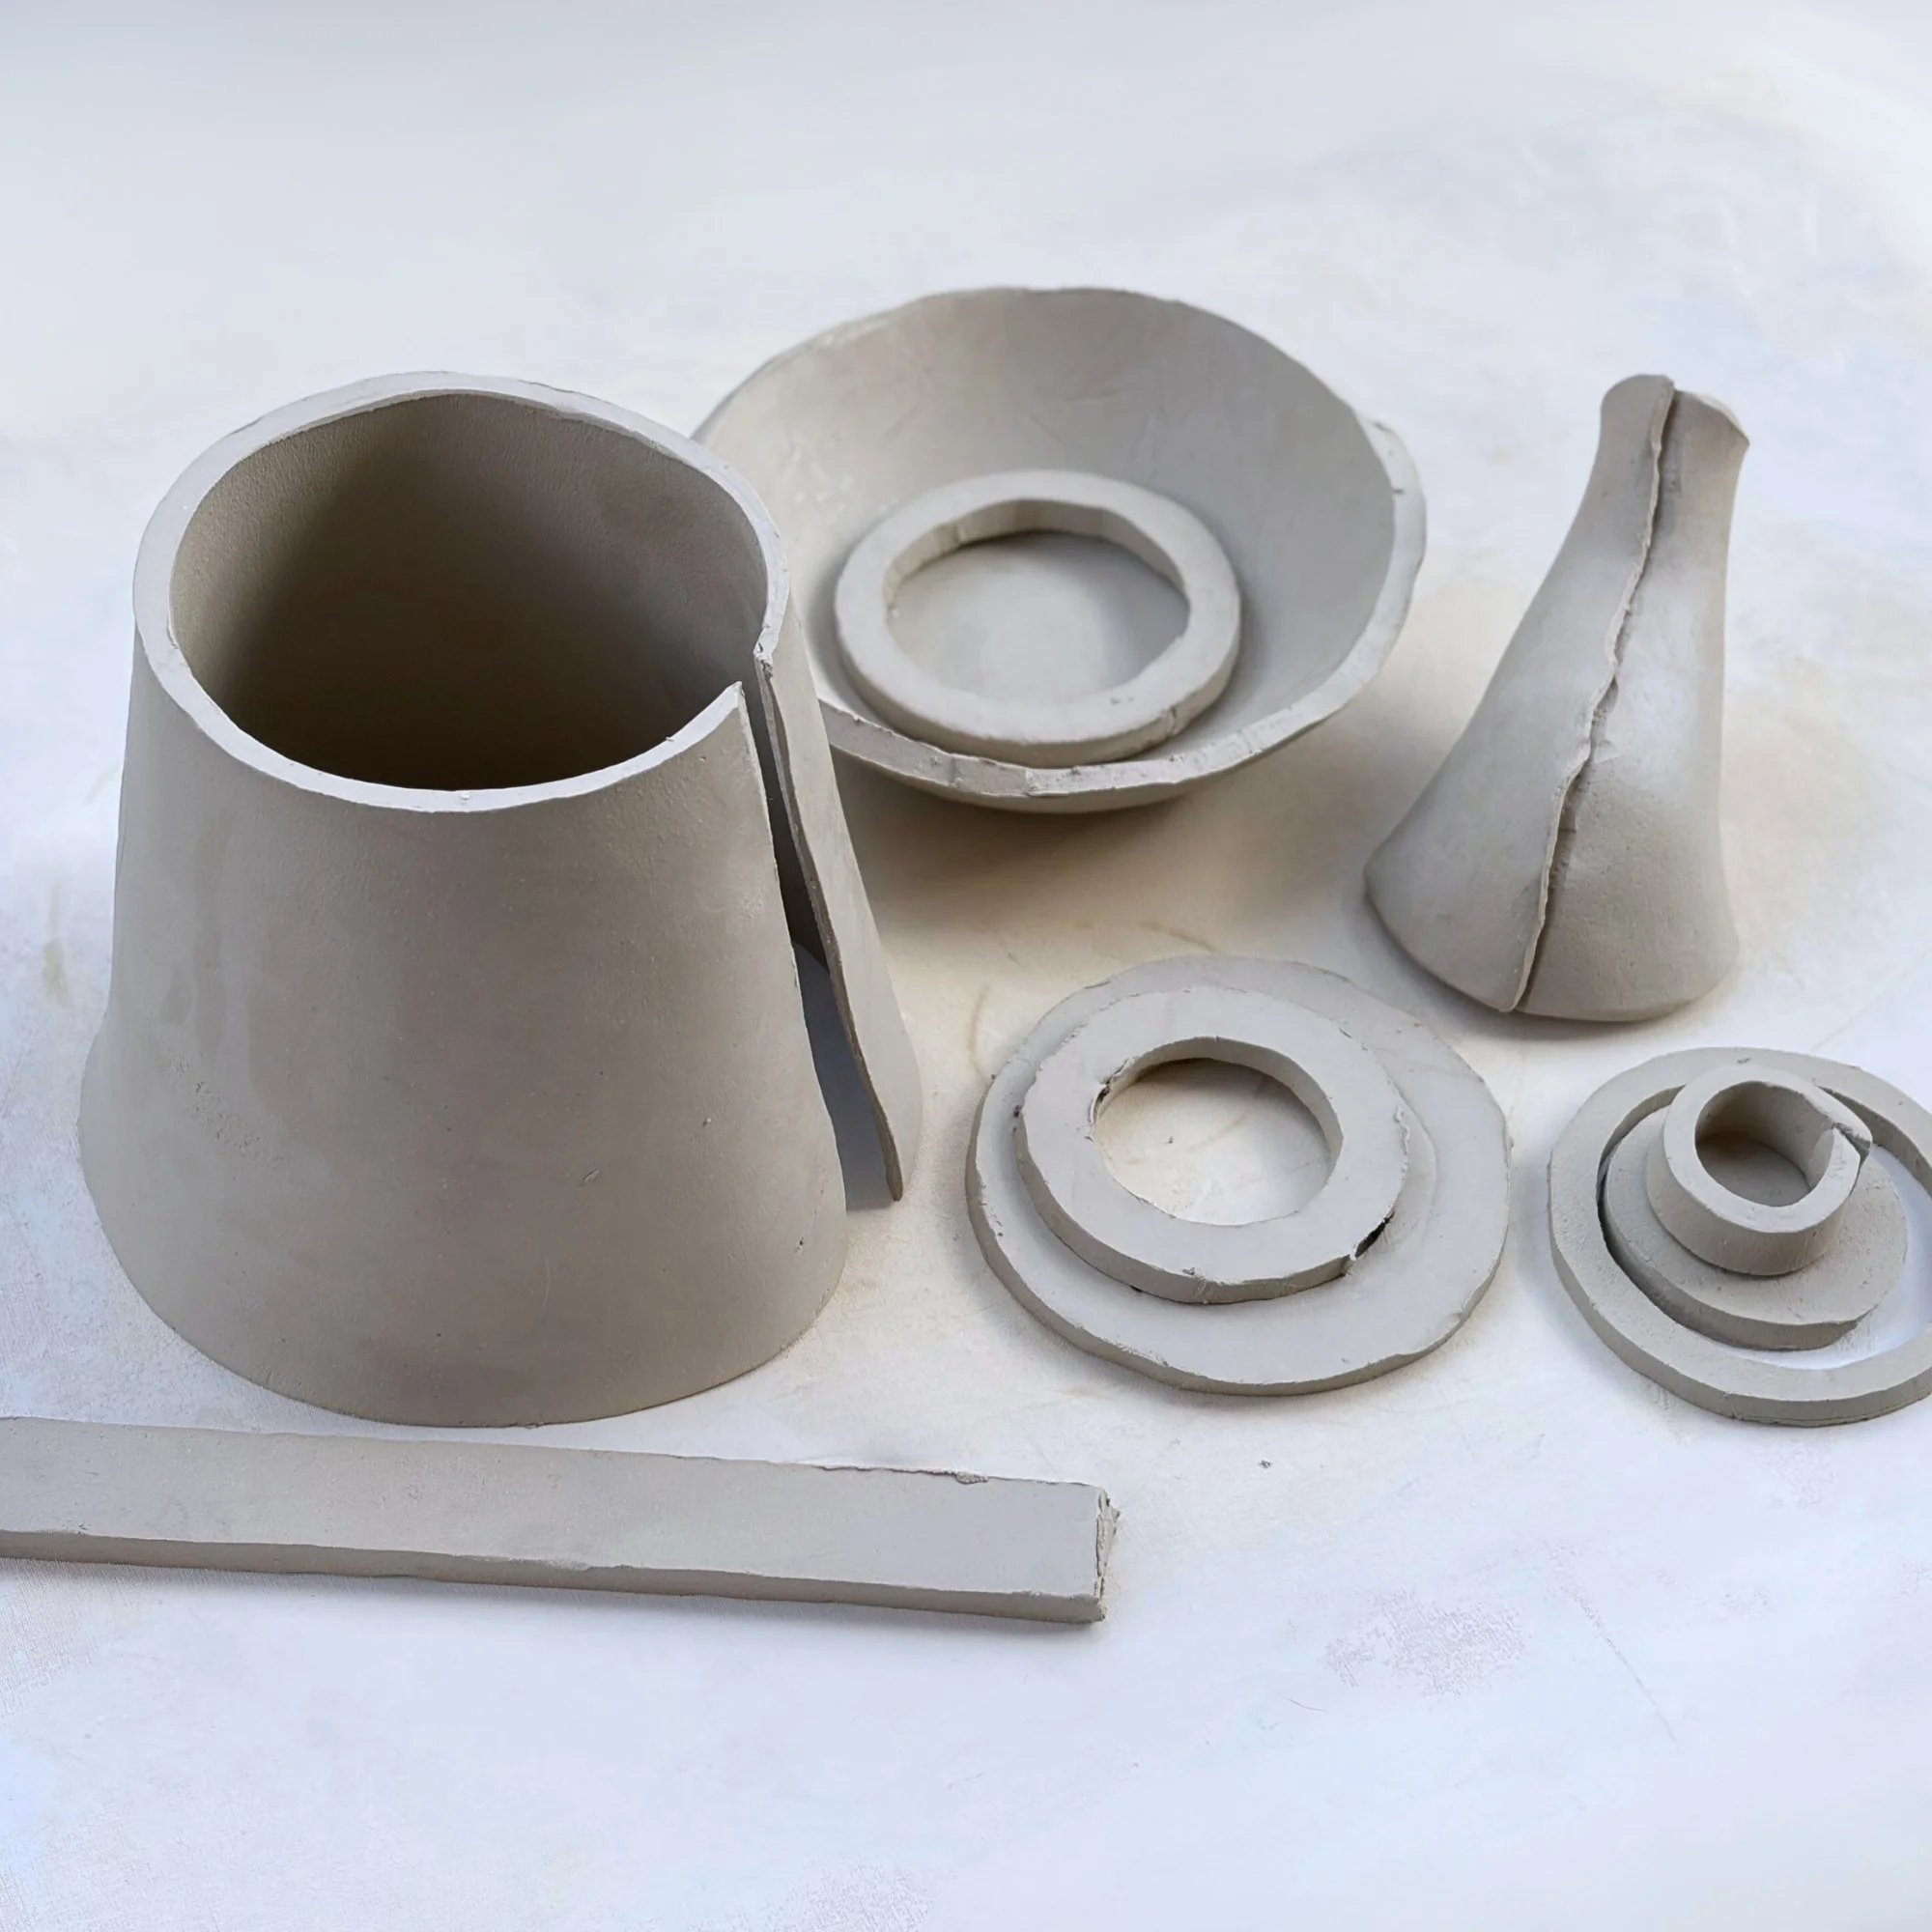
Step 1: Prepare the pieces
Print the template and cut out the pieces. Join the wall parts with tape (“Cut & Join”). Roll your clay slabs to 3/16 inch (5 mm) thickness. For the handle and footring, use 5/16 inch (8 mm). Trace the dotted lines lightly for later reference.If you like, add texture before cutting. Keep the handle wrapped in plastic to stay moist.
Step 2: Shape the base

Form the base over a round bowl of suitable size. Alternatively, when the clay is between fresh and leather-hard, you can shape it by hand: Place the base flat on the table and pinch the edge upward between thumb and forefinger. Lift the rim slowly, in several passes, until it stands about 1½ inches (4 cm) high. Let it dry to leather-hard.
Step 3: Shape the walls and knob

Shape the side wall, the lid ring, and the spout. For the knob, roll a small clay carrot and trim it on both ends. Let all pieces dry to leather-hard.
TIP: Before joining seams, slightly overbend both cut edges to influence the clay’s memory, ensuring a smooth, rounded rim and reducing warping during firing.
Step 4: Assemble the foundation
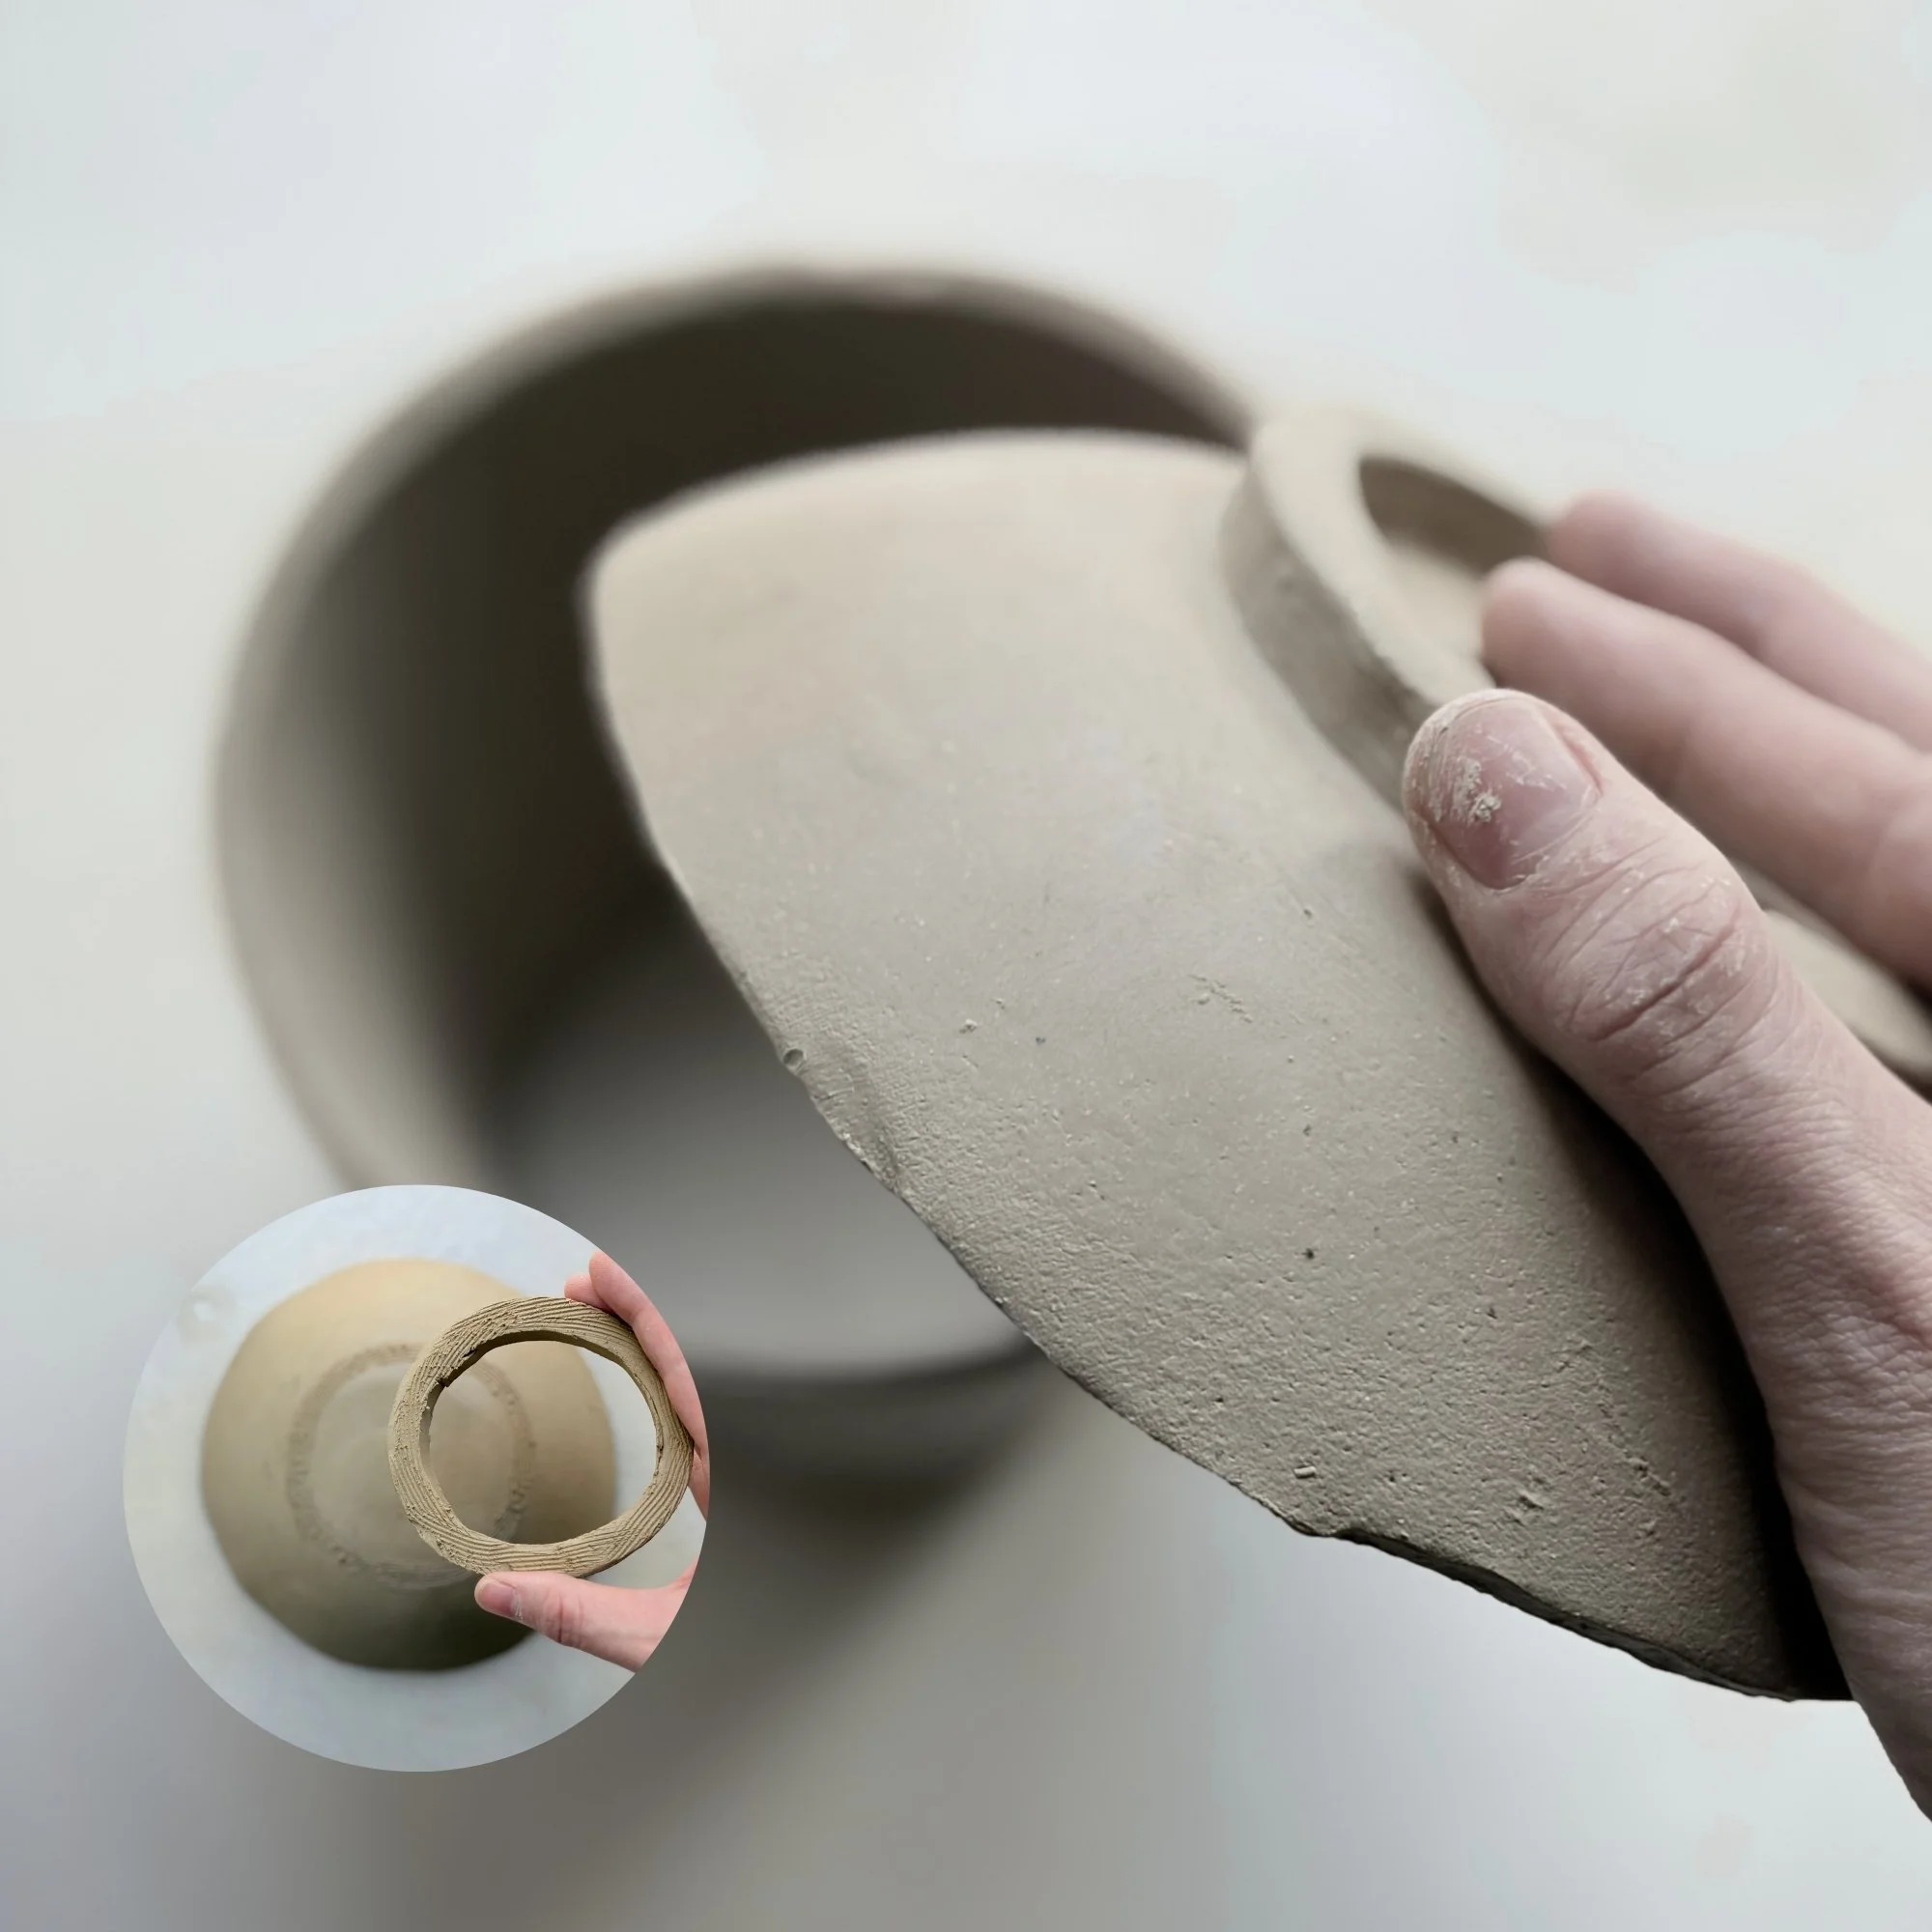
Once all parts are leather-hard, start building: Attach the footring to the base, then close the wall and join it to the base. Whenever you attach parts: Always score and slip the edges before joining. Press firmly, then reinforce seams with fresh coils and blend them with a rib or damp sponge.
TIP: Use a small spirit level while building your teapot to check alignment and make small corrections as needed.
Step 5: Add the top and make the lid
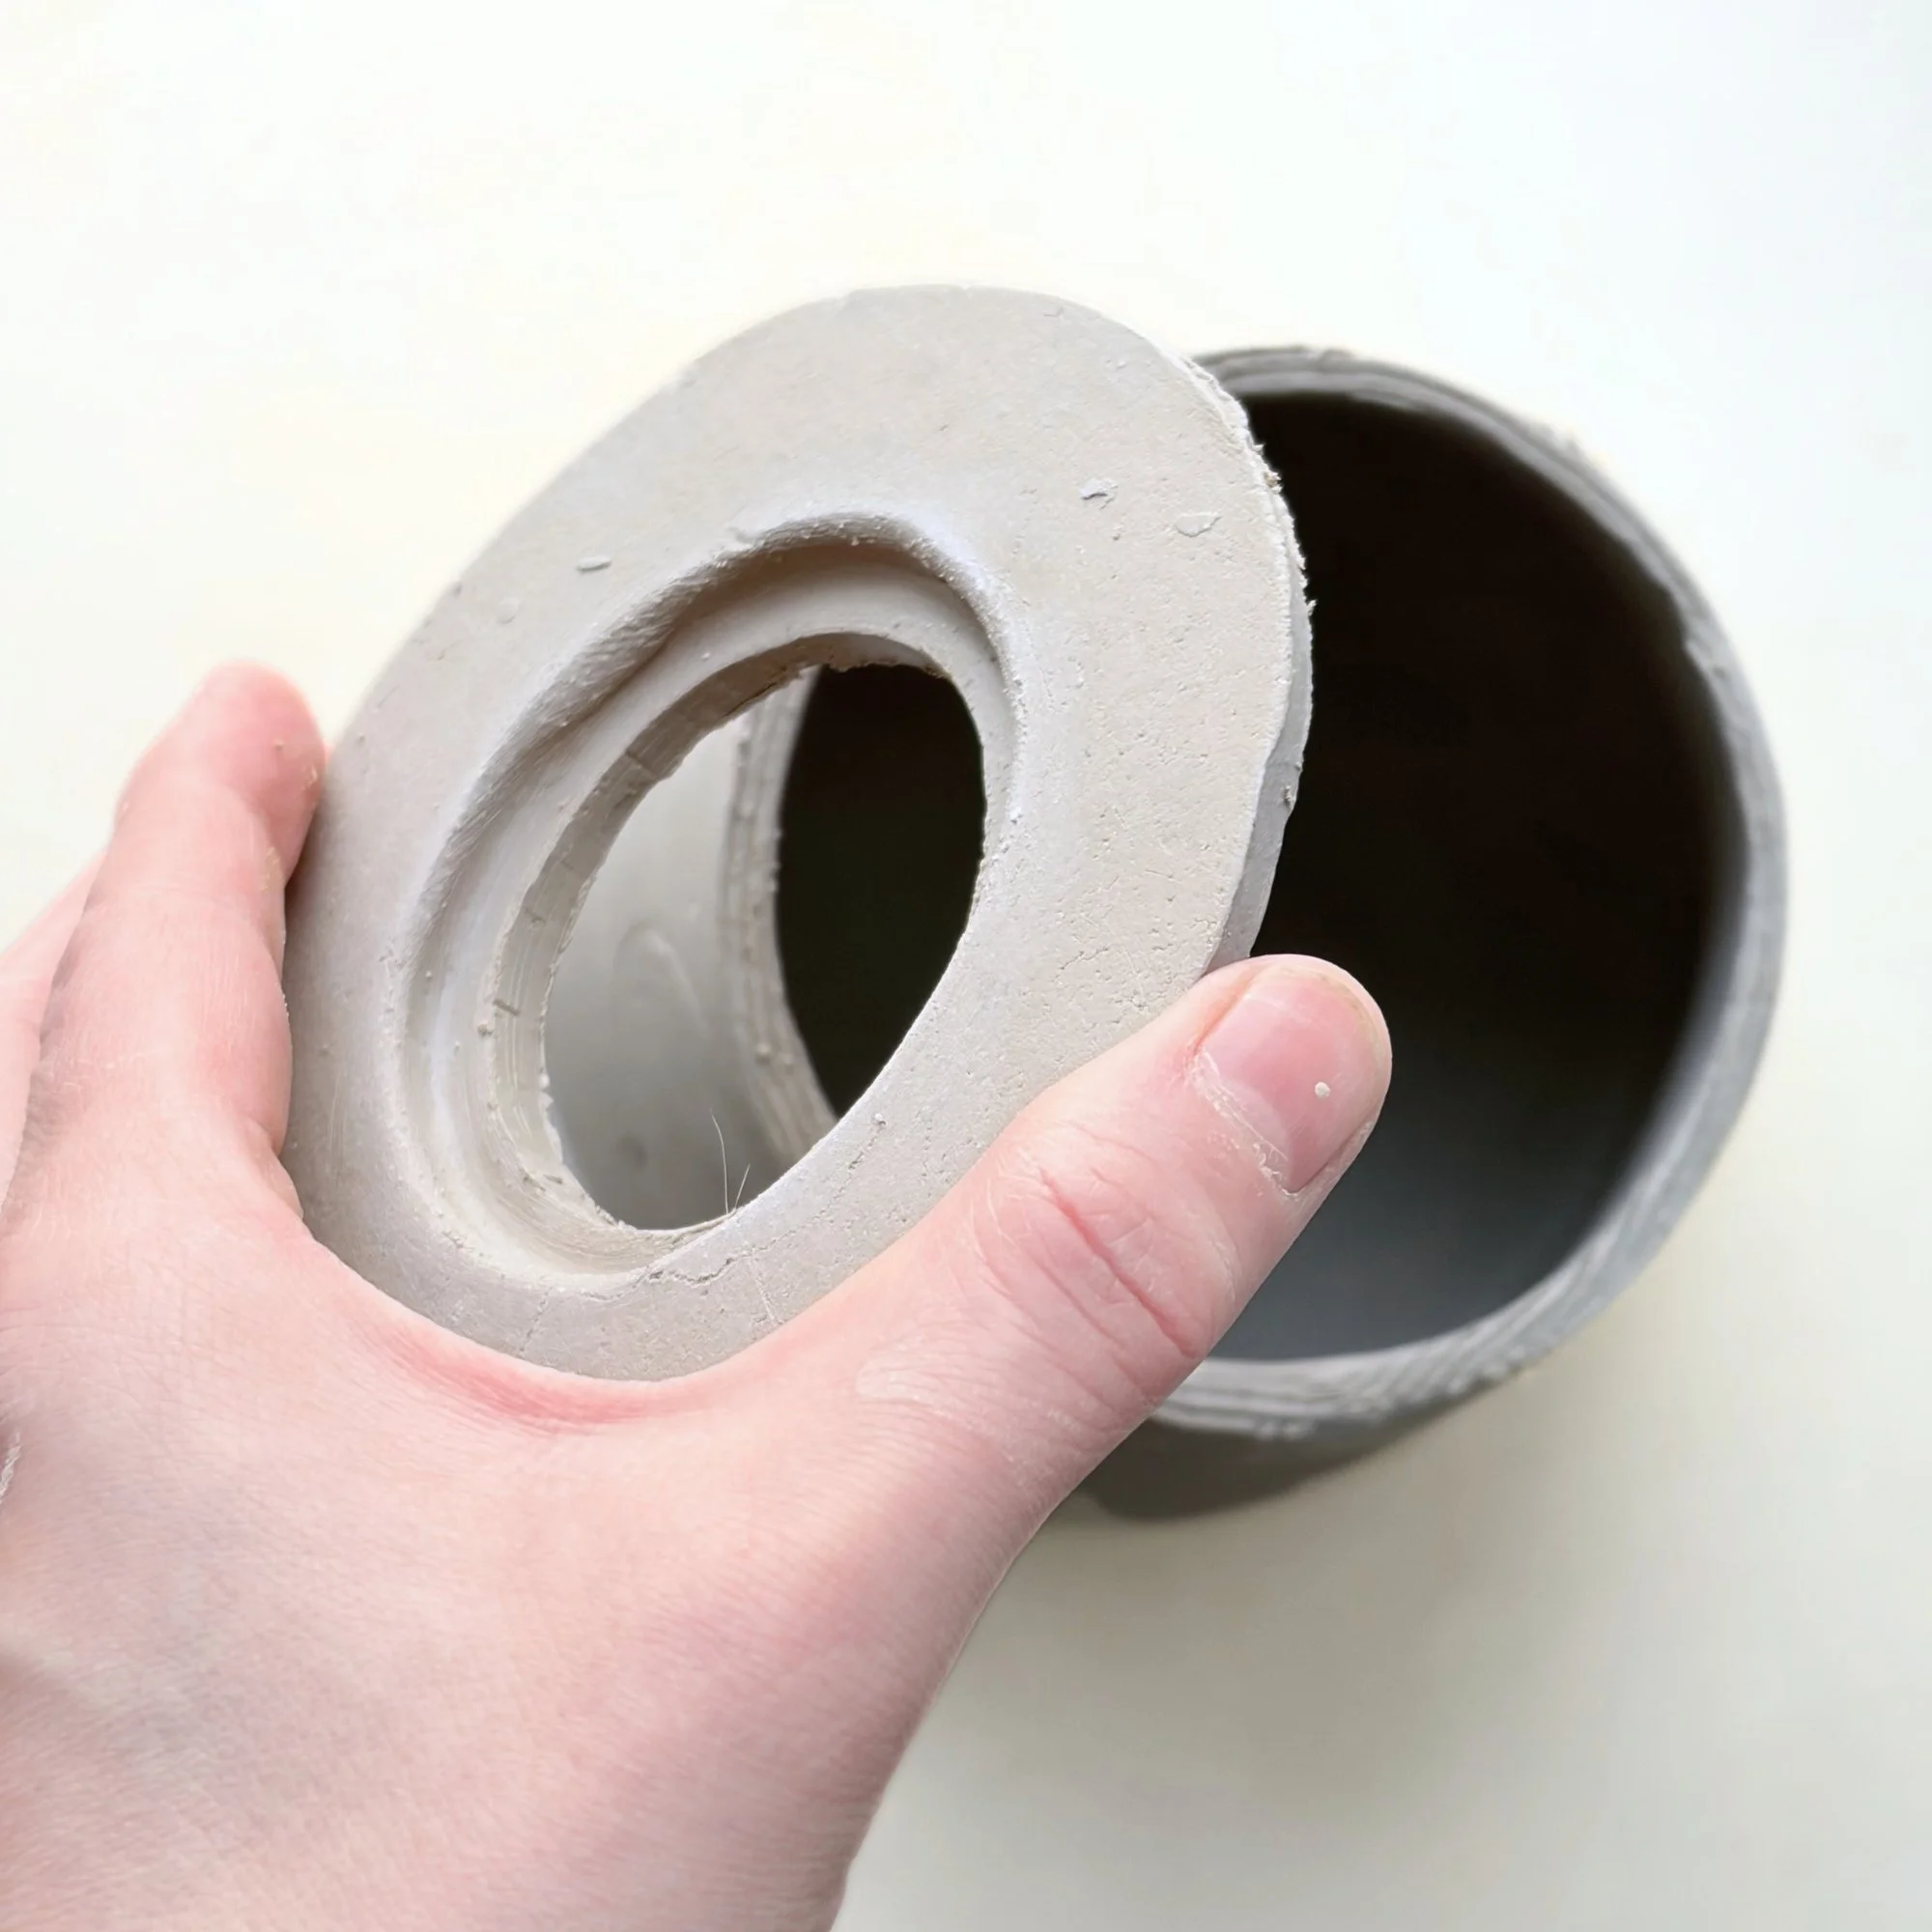
Attach the gallery to the top piece, aligning it with the dotted line for perfect centering. This area will serve as the lid seat. Then attach the top with the gallery ring facing down on the wall and smooth the seam.
Connect the lid ring to the lid. Join the knob to the lid. Don’t forget to add a small air hole in the lid so the teapot pours smoothly.
Step 6: Build the spout
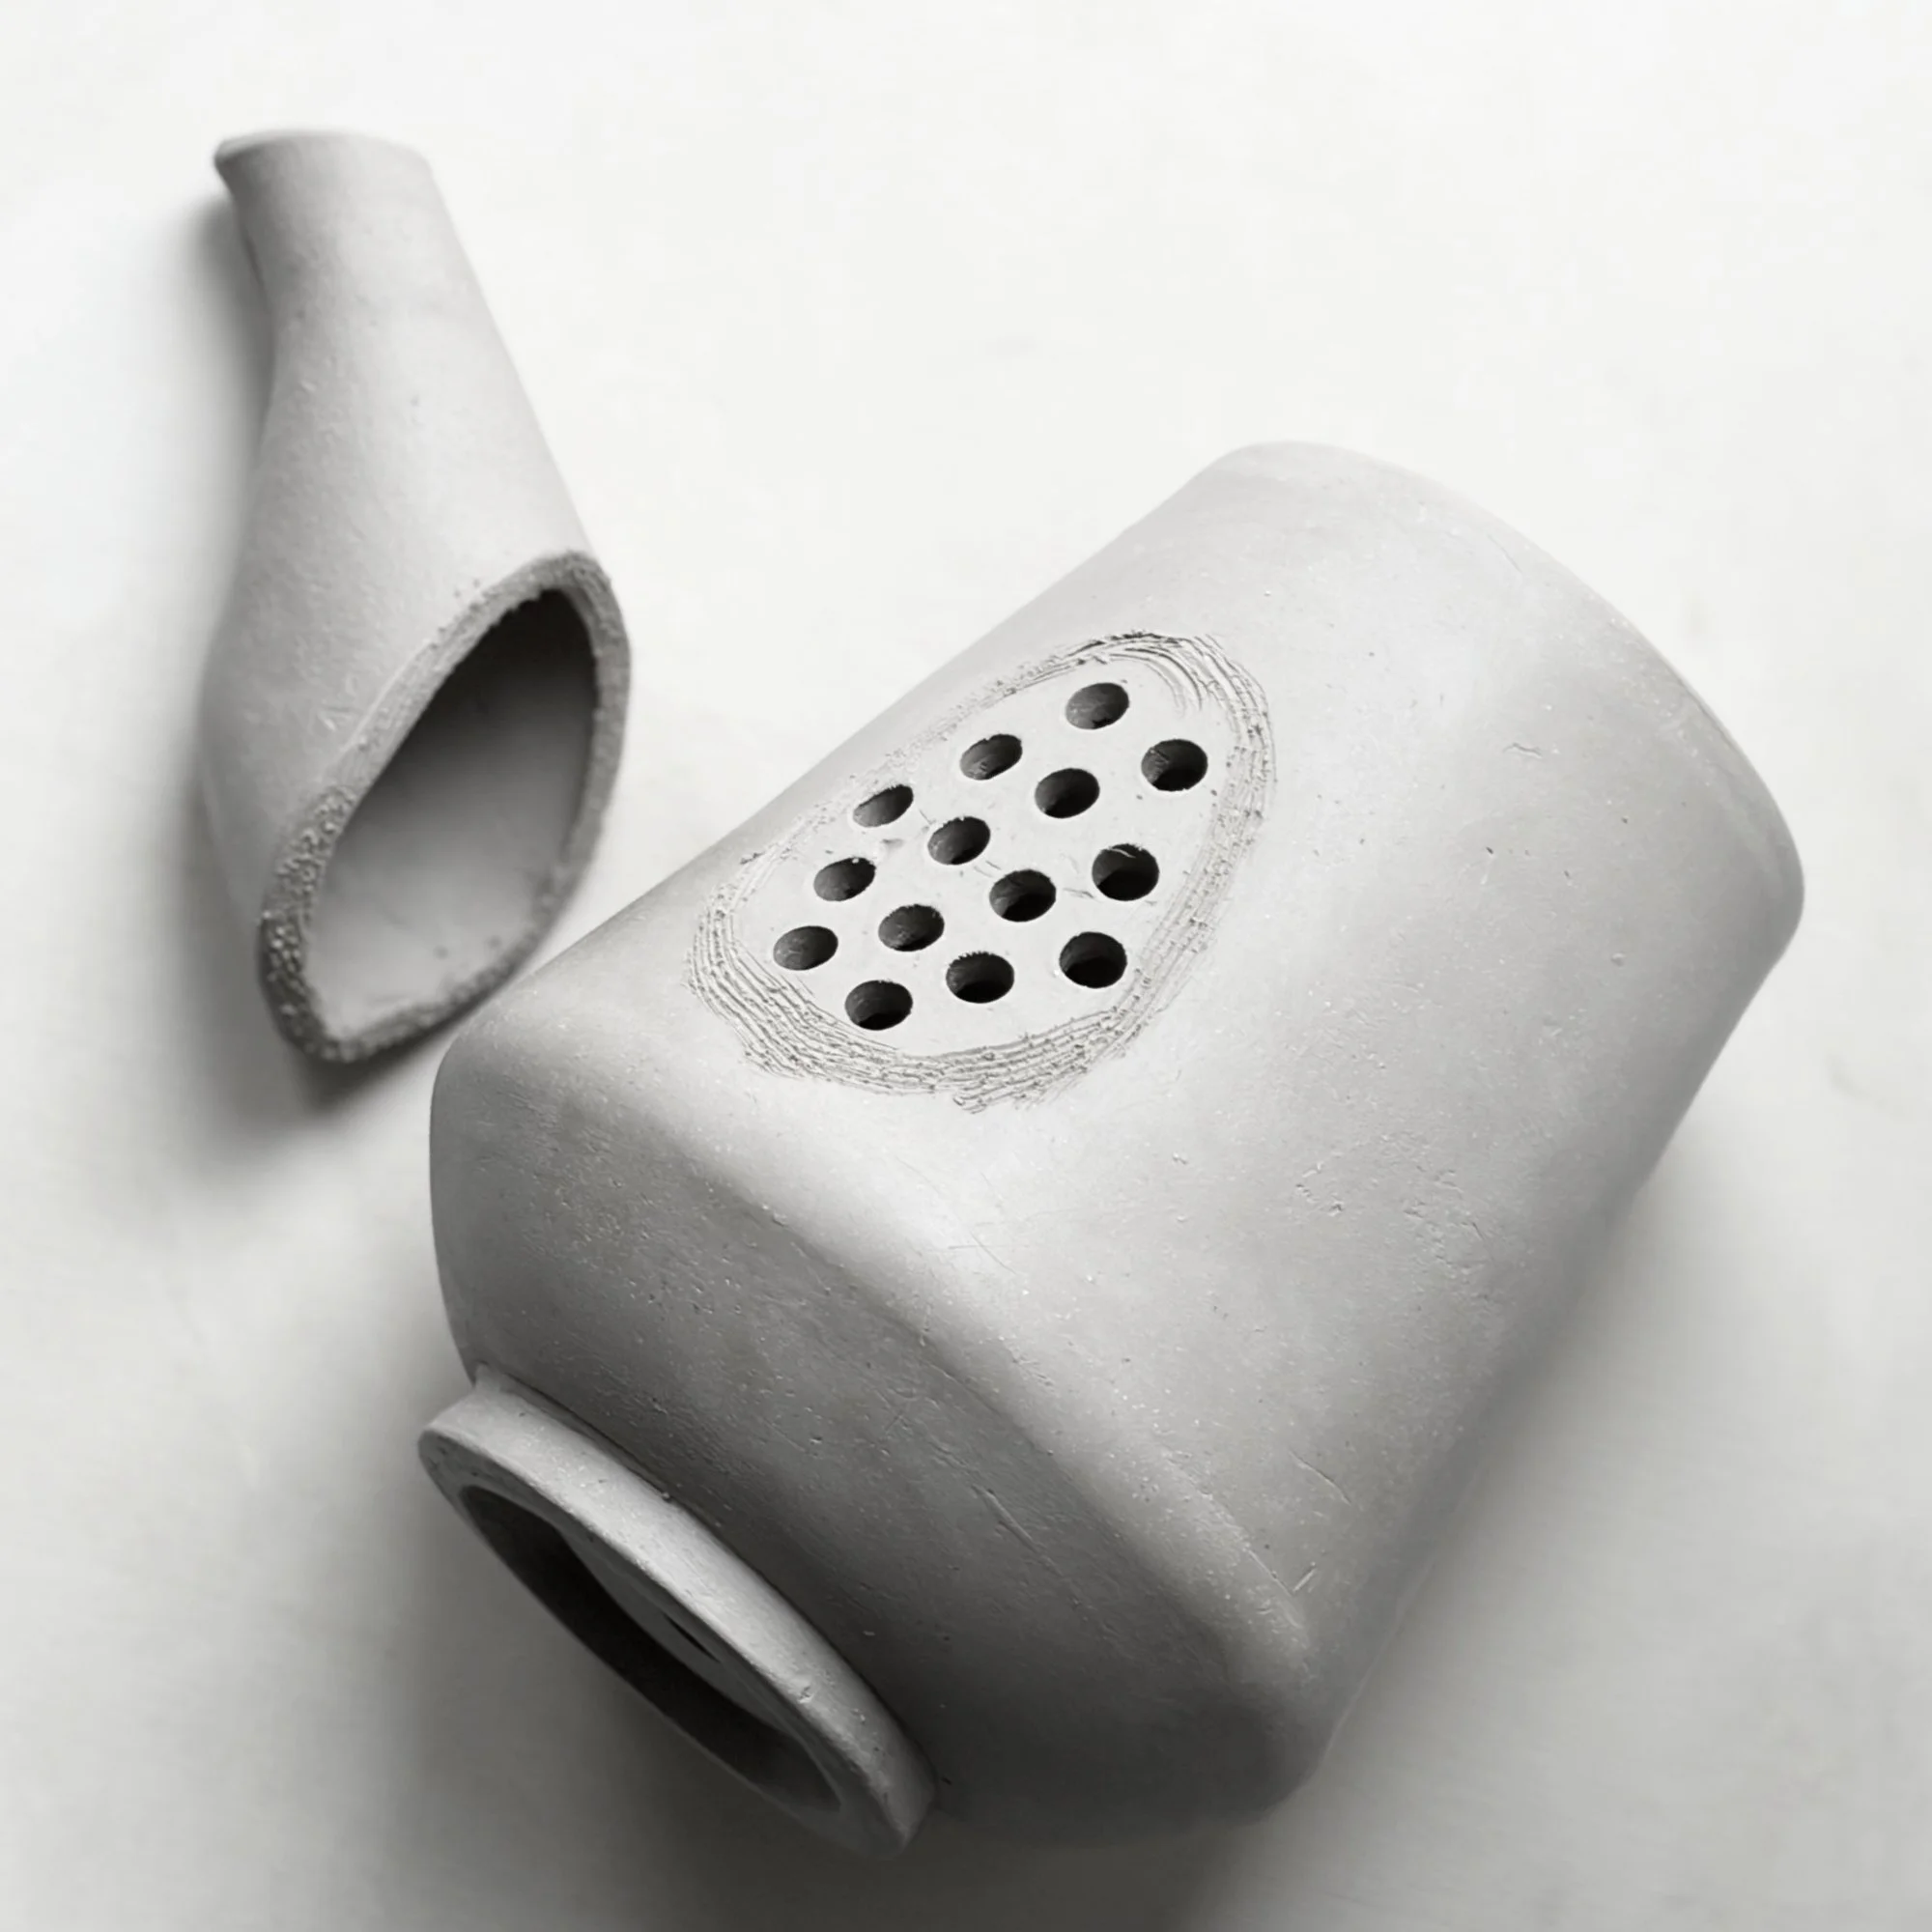
Join the seams and refine the spout shape. Smooth all seams from the inside and outside. Pierce several holes in the teapot wall where the spout will connect — not too small, so the liquid can flow freely (glaze might make the holes smaller). Attach the spout, smooth the joints, and refine it following the Spout Tips (at the end of this post) for a cleaner pour.
Step 7: Attach the handle
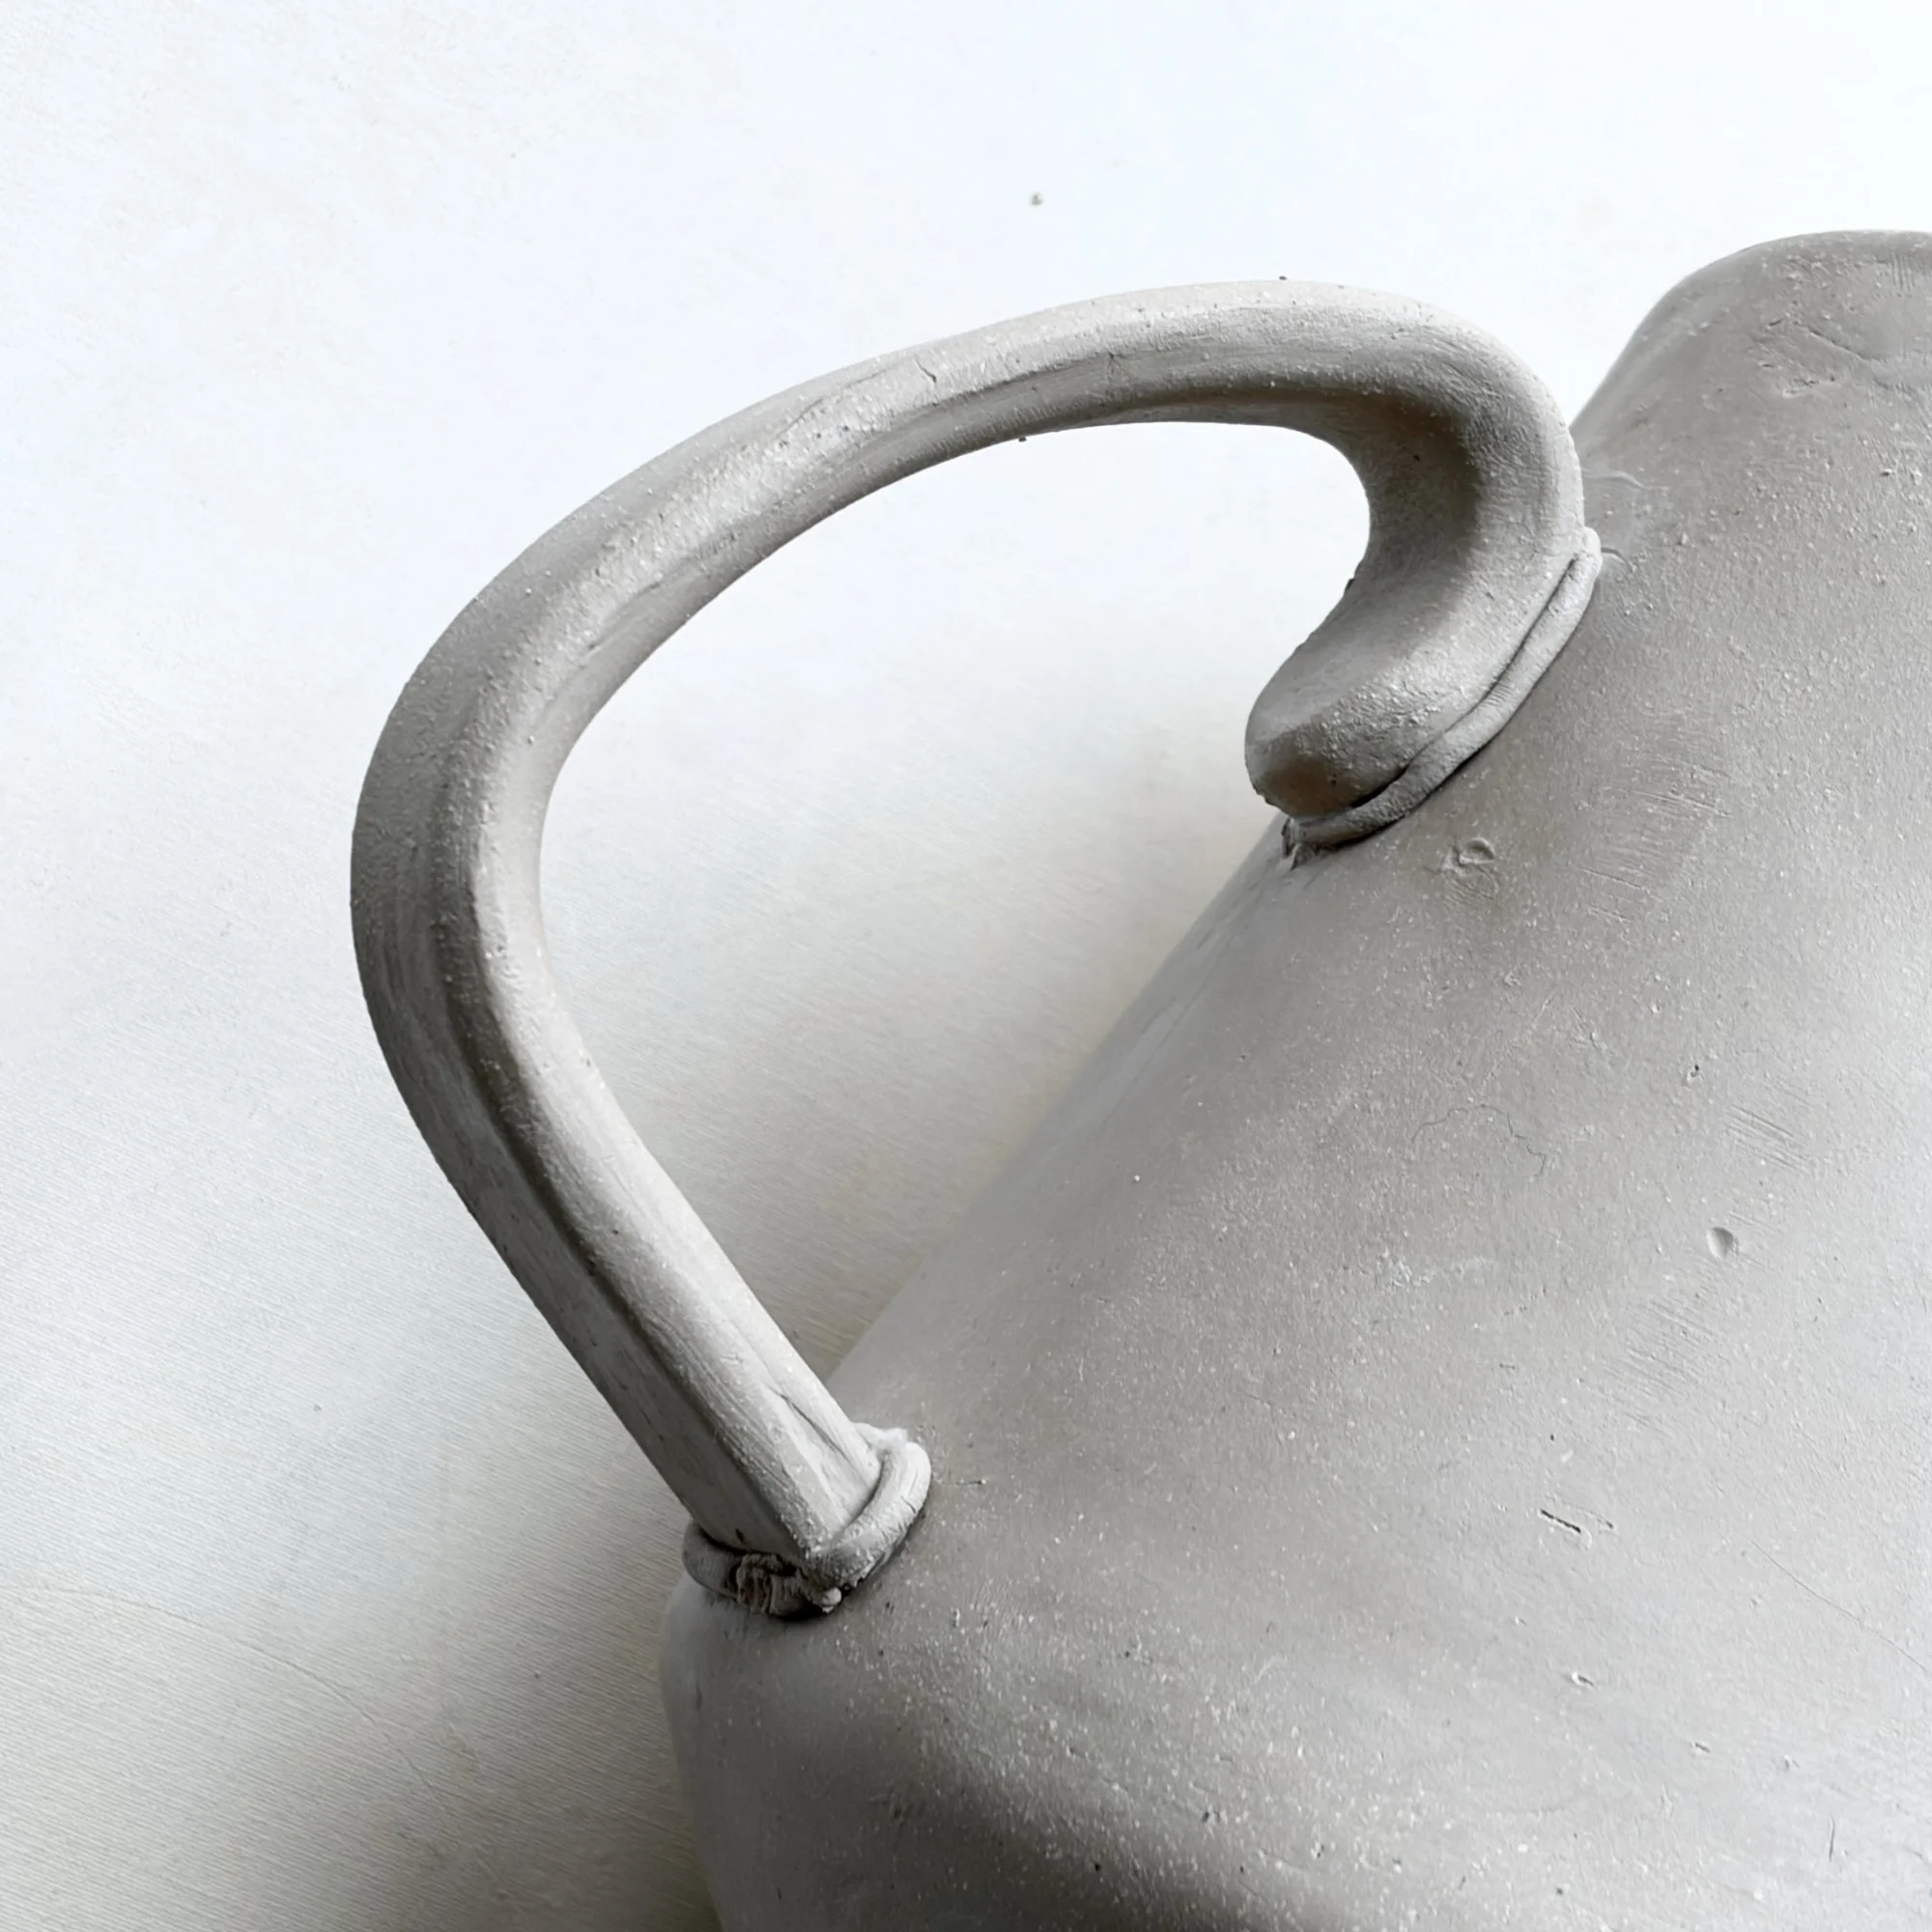
Round all edges of the handle with a damp sponge, if needed in multiple rounds, then place it on the form on your template sheet. Let it dry to leather-hard, then test the fit and trim if needed. Score and slip both ends, attach securely, and reinforce joints with fresh coils. Smooth everything with a rib and damp brush.
Step 8: Refine and dry slowly
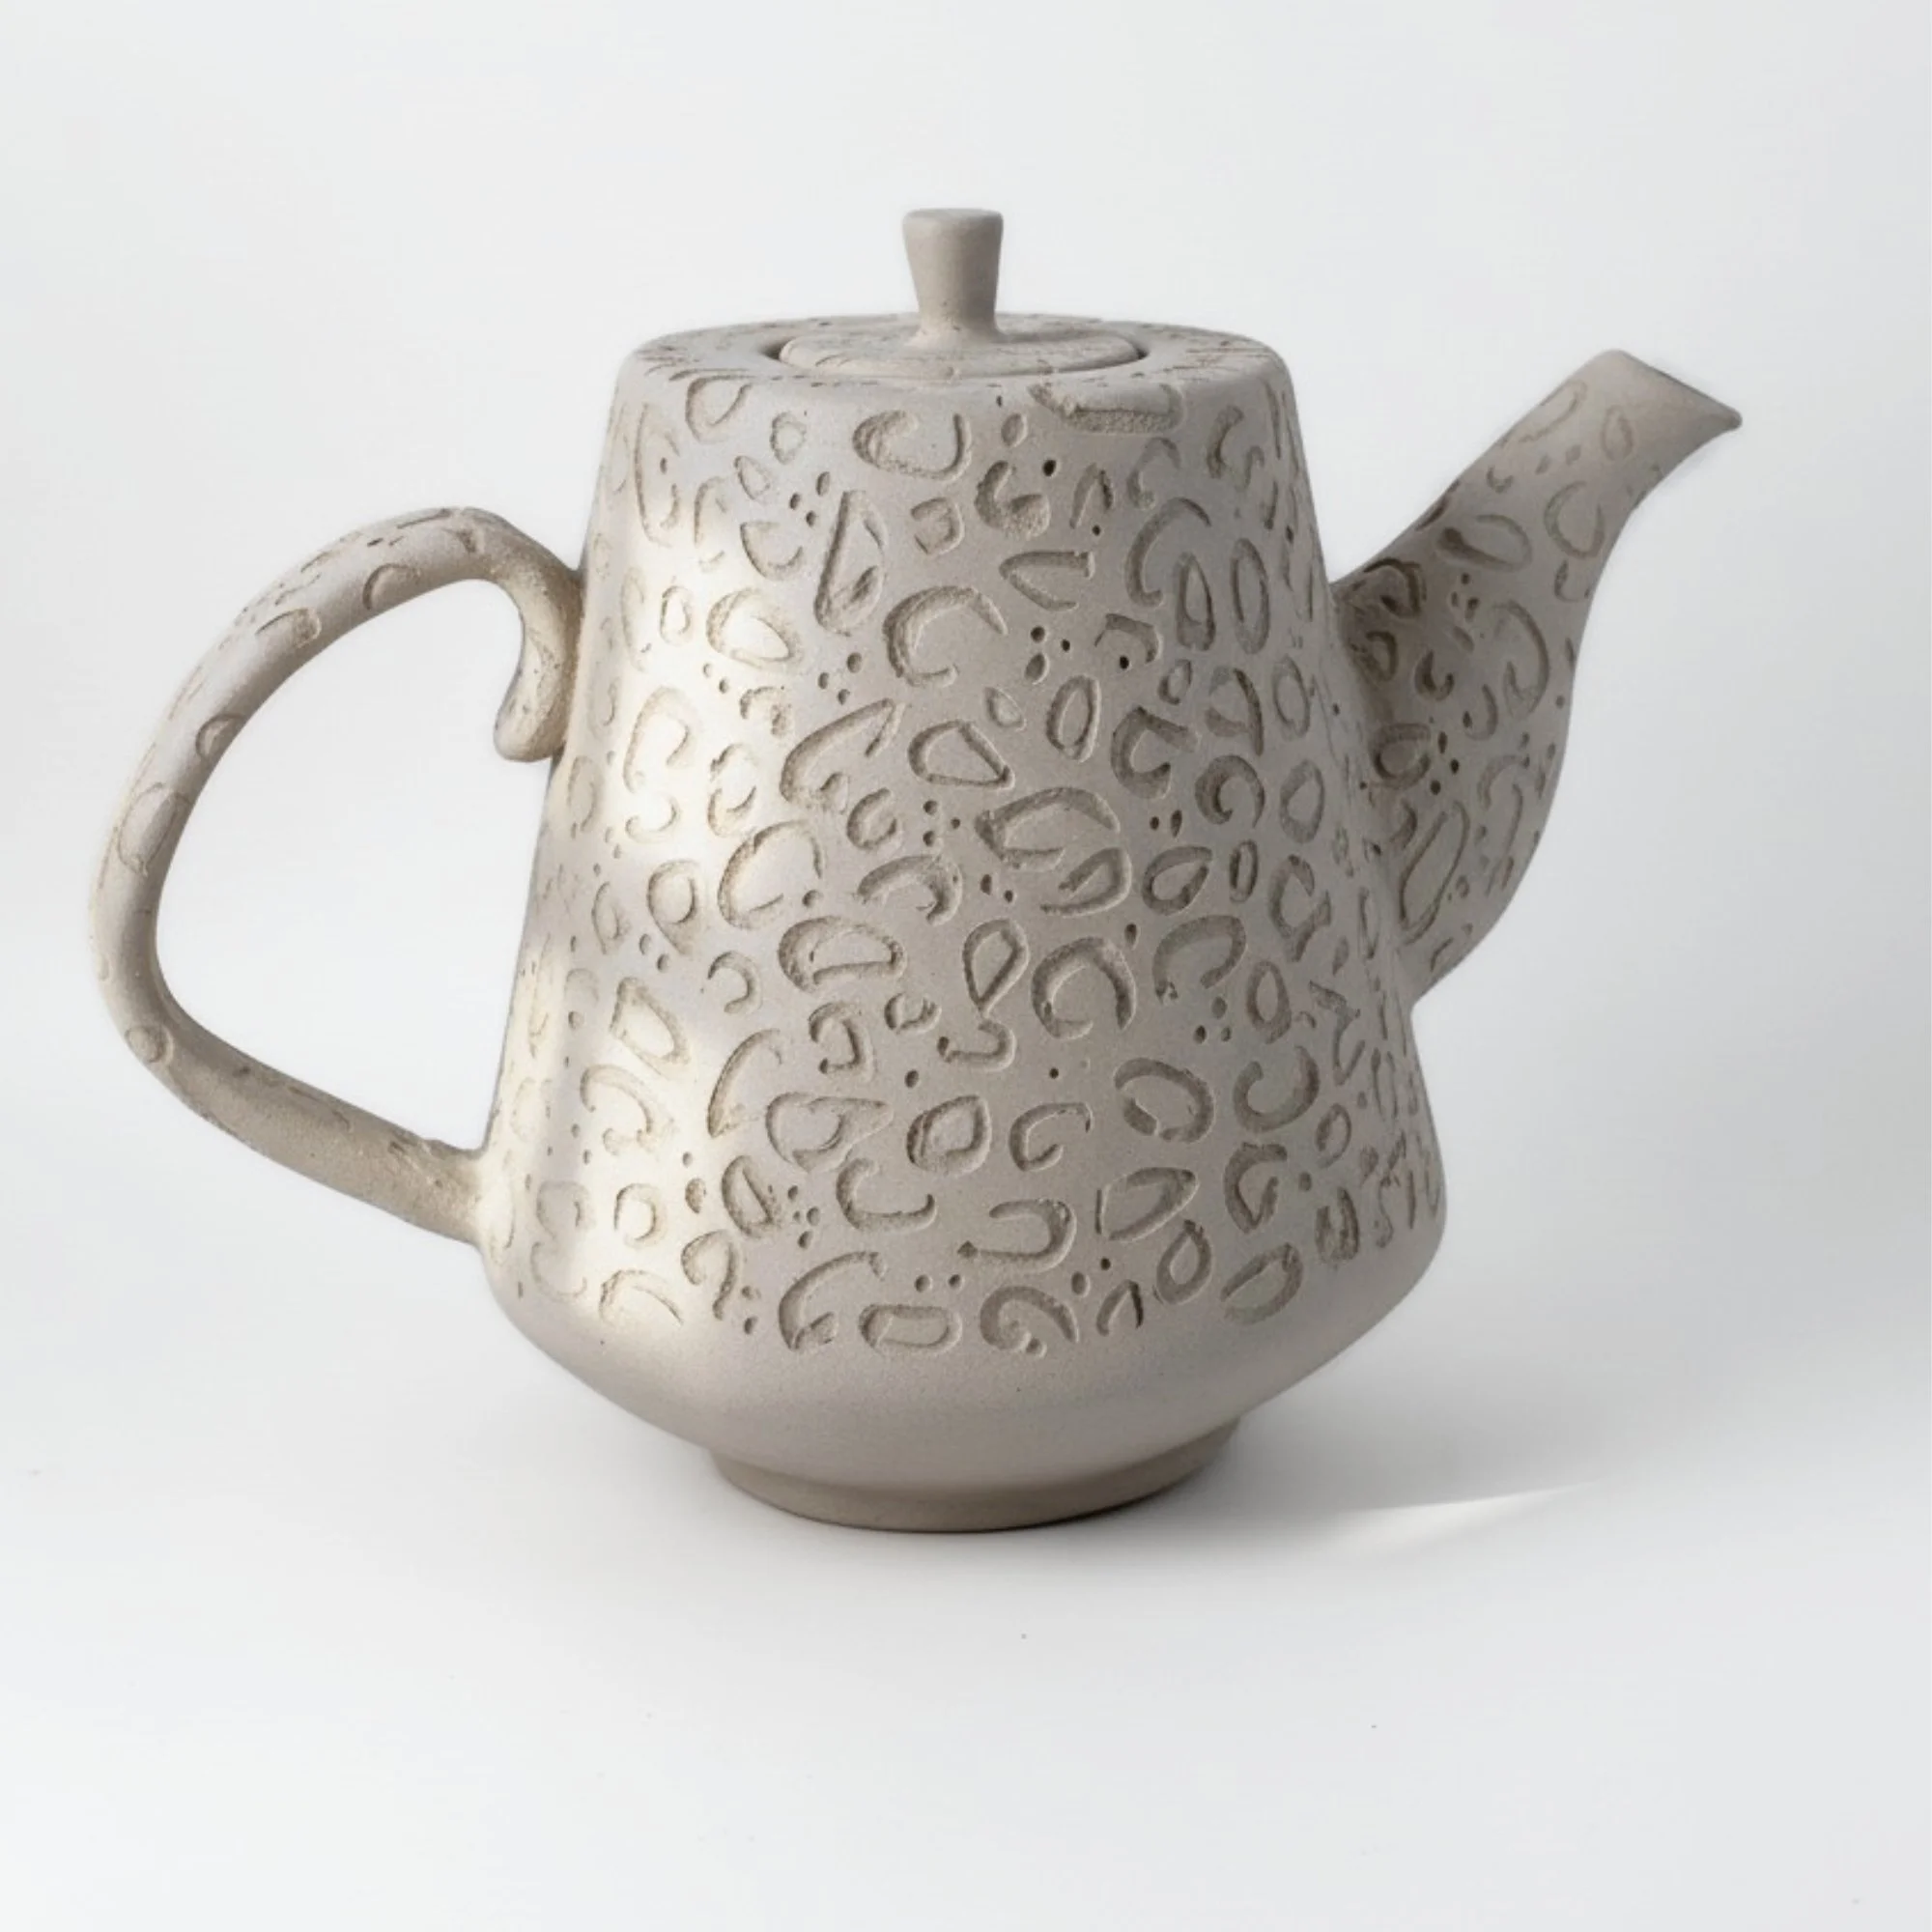
If you like, customize your teapot, e.g. by carving or stamping decorative patterns onto the surface while the clay is leather-hard. Smooth edges and refine details with a damp sponge or soft rib tool.
Allow the piece to dry slowly and evenly to prevent cracking. Lightly cover it with plastic to regulate the drying process, especially around the handle and knob. When glazing, make sure not to apply too much glaze around the lid hole or the spout holes — it’s important that they stay open and don’t seal shut during firing.
Tips for a better pour
A good teapot is not just beautiful. It also needs to pour well. Keep these details in mind:
Add a vent hole in the lid.
Make the inside of the spout as smooth as possible.
Keep the spout tip nearly level.
Do not make the opening too small.
Balance the handle, lid, and spout carefully.
Small adjustments can turn a nice project into a truly lovely handmade teapot to use.
Why a template helps
A teapot template saves time, reduces measuring mistakes, and gives you a reliable starting point. That is especially helpful for beginners who want a good result without struggling through trial and error. It is also useful if you want to make a giftable piece or create more consistent forms for your shop.
If you want to make this project easier, you can get the printable teapot template in my Etsy shop. It is a practical way to skip the guesswork and start building with confidence.
FAQ
-
Yes. With a good template and careful joining, slab building works very well for teapots.
-
No. You only need a few basic pottery tools for scoring, shaping, smoothing, and assembling the pieces.
-
Yes. A finished teapot is a beautiful and thoughtful tea lover gift, especially when it is handmade.